Greetings friends. I am back again watercoloring one of the new clear stamp sets from Memory Box. This time I used the Bird Sanctuary set with coordinating dies. As I did with my previous post, I colored my central image with some Zig Clean Color Real Brush markers as well as a waterbrush to soften the colors. Here is a close up of the bird:
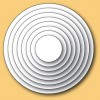
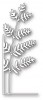
For the rest of the card, I cut a large white circle using the one of the nesting Circle Layers dies as well as green foliage using the Tall Fern Left Corner and Tall Fern Right corner dies. For the sky, I used a cloud template and sponged some Tumbled Glass Distress ink to give the impression of the sky with clouds. Finally, I added my sentiment from the same stamp set, added a few sequins and popped up the bird with some foam tape.
I wanted to do a mini tutorial about how to line up stamp with coordinating dies. Everyone has their own method, but I thought I would show you step by step what I do.
I start by cutting a piece of cardstock in half and then die cutting the dies from my coordinating set. I usually cut all of the dies, even if I am not using all of the images for my current project. After all, if you have the die cutting machine out, why not cut extra?
In picture 1, you can see my MISTI stamp positioner. I set aside all the birds I cut in the die cutting machine and took my half sheet of paper that had the negative space of the birds and placed it in the MISTI.
In Picture 2, I placed the coordinating stamps in the bird shaped holes of my template I had in the MISTI. It helps to stand up over your MISTI as you do this so that you can look straight down and move the stamps around until they are centered in each of the holes.
Shut the MISTI cover and press down so that all of your clear stamps stick to the MISTI lid.
Picture 3- when you open the MISTI lid, you will see your template on the left with the bird shaped holes in the paper, and on the right hand side, you will have the stamps that are stuck to the lid.
Picture 4- place your die cut birds back into the bird shaped holes of your template and ink your stamps with whatever ink you choose. In this case, I used black Versafine since I would be watercoloring my images.
Picture 5- close the MISTI lid and stamp the birds onto the bird die cuts. If you don't get a clean image, reink the birds and stamp again. I like to use the MISTI because I often have to stamp my images more than once when I am stamping on watercolor paper.
Picture 6- Optional... cut out lots of birds and keep repeating the process. The step that takes the longest is making sure your stamps are centered in your template with the bird shaped holes. Once you get everything lined up, it makes sense to stamp a bunch to have on hand when you need to make a quick card. I usually cut a bunch and have them ready to color.
Picture 7- I don't usually color images in advance because I don't know what colors I will want to use in the future. However, I sometimes sit in front of the tv and get in a coloring zone. I went ahead and colored the birds in an assortment of colors.
Picture 8- For storage, I use a clear pocket from Avery Elle and load it with the stamps, the dies, and all of my cut images. I do that so that I don't lose any of the small pieces and I can easily find what I am looking for.
I hope this tutorial helped. Let me know if you have any questions or if I didn't explain something very well.